Cooking Gluten-Free with Anna

Showing posts with label fika time. Show all posts

Sunday, February 17, 2013

I love Semlor


Swedish Semlor


These Swedish almond paste and whipped cream filled cardamon buns are traditionally served during Fat Tuesday. Nowadays, Swedes are happily inhaling them as often as they can be found. Semla is a cardamon-spiced bread, which has its top cut off and insides scooped out, then filled with an almond paste, and topped with whipped cream. The top is dusted with some confectioners' sugar.

Ingredients:1 1/4 cups sugar1 1/4 cups GF flour blend2 tbsp GF psyllium powder (Metamucil) 2 tsp baking powder2 tsp ground cardamon 1/8 tsp salt4 tbsp butter, melted3 eggs, lightly whisked1 1/4 cups cultured Kefir, or buttermilk

6 ice-cubes

2 cups heavy cream1 tbsp vanilla pudding mix

Filling:5 tbsp heavy cream7 oz GF almond paste

Decoration:confectioners' sugar

Directions:

Preheat the oven to 450 degrees F. Place a cookie sheet on the lowest oven rack. 

Line cupcake pan with 8 large paper liners. Set aside. 


In a medium bowl, whisk together sugar, GF flour, psyllium, baking powder, cardamon and salt. Add the melted butter, eggs and Kefir, and mix until incorporated, scraping down sides of bowl. Divide batter evenly among the 8 liners. 


Place cupcake pan on the pre-heated cookie sheet. Add 6 ice-cubes on the cookie sheet, and quickly, close the oven door. Bake until cupcakes are lightly golden, about 15-20 minutes. Do not open oven door the first 15 minutes. Transfer to wire to cool completely under a clean kitchen towel.

Whip the heavy cream together with the vanilla pudding mix until the cream forms soft peaks.Make filling: grate almond paste and mix with the heavy cream. 

Cut the tops of the cupcakes. Using a spoon, scoop out about a teaspoon of the inside of each cupcake. Fill the wholes with the almond paste. Spoon dollops of the whipped cream on each cupcake. Replace the tops. Dust with confectioners' sugar and serve! 

Smaklig Måltid~ Bon Appetite

Wednesday, June 20, 2012

Strawberry season is finally here ~ time to make Rustic Strawberry Crostata.


I'm back home in the good old USA! It was wonderful to spend so much time with my family in Sweden, but it's really nice being back home. And to sleep in my own bed.  And cook in my own kitchen. I tried lots of new recipes in Sweden that I will adjust to American measurements. Many will end up on the blog in the future.  While in Sweden, I had problems with my laptop and the access to Internet, so my blog entries got fewer and far in between. And unfortunately, it rained a lot. According to records, it hasn't rained this much since the beginning of the century. Hopefully, it'll turn around for tomorrow, when Swedes celebrate Midsummer. A day of eating and partying - a Smörgåsbord filled with yummy dishes like; Gravlax with dill-mustard sauce, pickled herrings, gilled meats, Janson's Potato Temptation. All washed down with a few snaps (vodka shots).  I'll have to make my own versions of the food here at home!

This is a nice time of year to return to Massachusetts, with summer and vacation time around the corner.  And with strawberry season just beginning, it makes it extra sweet. I love the amazing fresh produce arriving at the local farmer's markets right about now. Time gorge on lots of strawberries! 


I bought several quarts at a local market and went home and made some strawberry jam and a pie. I have a great Rustic Apple Crostata recipe that I alter, according to whatever fruit and berry is in season.  I love the homey look of this pie. It's super easy to make and the gluten-free pie crust is flaky and delicious.  The fresh strawberries added just the right sweetness. This rustic tart is my contribution to Månadens Sötsak, a wonderful Swedish baking blog ~ www.sotsaker.com  The theme for this month is Fresh (Friskt in Swedish).  And what can be fresher than freshly picked strawberries! It's also my contribution to Pie Party 2012 on Facebook. 


Rustic Strawberry Crostata
1 quart strawberries
4 tbsp sugar
1 tsp fresh lime juice
1/2 tsp ground cinnamon
pinch of kosher salt
2 tbsp butter, cut into bits
2 tbsp heavy cream, to brush crust
1 tbsp sugar, to sprinkle on crust
Recipe for Pate Sucree (crust) follows
Preheat the oven to 350 degrees.  
Cut the strawberries into small pieces and place in a large mixing bowl.  Add the sugar, lime juice, cinnamon and salt and toss to coat well.  Set aside to let the flavors blend for 10 minutes.
On a well floured (gluten-free brown rice flour works well here) parchment paper, roll the dough out into a 15-inch circle.  


Transfer the dough and parchment paper to a baking sheet.  Mound the strawberries in the center of the dough, making sure to leave a 2-inch border.  


Dot the berries with the 2 tablespoons of butter and fold the dough border up around the strawberries. (The border won’t cover the strawberries.)  Brush the dough with the heavy cream and sprinkle with the 1 tablespoon of sugar. 
Place the baking sheet in the bottom third of the oven for 30 minutes.  After 30 minutes, move the baking sheet to the top third of the oven for an additional 30-40 minutes, until the crust is golden.  Remove and let cool for 15 minutes before serving.  Drip some of the strawberry juice, that may have seeped out around the pie, back onto the strawberries. Serve warm or at room temperature with a dollop of ice-cream or whipped cream. 
Make the crust - Pate Sucree:
3/4 cup brown rice flour
1/4 cup potato starch
1/4 cup sweet rice flour
4 tbsp sugar
1 tsp xantham gum
1/2 tsp kosher salt
10 tbsp butter, chilled and cut into bits
2-3 tbsp ice water
Put the flours, sugar, xantham gum, and salt into the bowl of a food processor. Pulse to combine.  Add the butter and pulse until the mixture resembles coarse crumbs.  With the food processor running, add the ice water 1 tablespoon at a time until a dough just begins to form.  Turn out onto a floured surface and pat into a disk. Wrap in plastic wrap and refrigerate for at least 30 minutes.  


Dig in and enjoy! 

Smaklig Måltid!


Friday, March 30, 2012

Seeking the crunch of Biscotti.


These sweet little cookies are ready in a flash and are wonderful with a cup of coffee. While in Sweden, I've been eating (or should I say inhaling) all kinds of traditional pastries. Each day, Swedes participate in a ritual called Fika ~ meaning a well deserved coffee (or tea) break. Often it's served with something sweet, like a cinnamon bun ~ kanelbulle, a pastry or a small cookie. People do this at home, at work, at a cafe, in the park, or wherever they may be. Whether at the beach or on the ski slopes, Swedes simply bring a thermos with freshly brewed coffee along with a snack.

Lots of bakeries in the capital of Stockholm offer gluten-free baked goods along with their 'regular' pastries made from wheat flour. Since I arrived, I feel like I've been on a mission to visit each one and try them all. So far, I've had Semlor ~ a heavenly bun filled with almond paste and whipped cream, Choklad Biskvi ~ a divine cookie with a nut bottom and chocolate butter cream filling, Istambullrulle ~ a decadent hazelnut roll filled with whipped cream and mandarin slices, and meringues. I'm happy to say that being gluten-free in Sweden is a piece of cake. Most bakeries offers yummy options to their hungry gluten-free customers!


Here, I'm devouring a Semla at Vetekatten in Stockholm (I saved the cinnamon bun for later).

And there are tons of store filled with candy ~ godis. As soon as I get off the plane, I head for the salty licorice. Yummy!


Yet, with all this decadence to be found, I long for a simple cookie. One with a satisfying crunch! Something that holds up to some serious dipping in my coffee. I want a cup of coffee and a biscotti, or skorpa as it's called in my native tongue. So, I started baking...

Biscotti can be made in a variety of ways; with nuts: hazelnuts, walnut or pistachio nuts, with spices: cinnamon, cardamon, anis, or with orange, lemon, or lime zest, add some dried fruit and berries: blueberries or cranberries, or simply mix in some chopped dark chocolate. And they are delicious when dipped in melted chocolate. Experiment, find the combination you desire; make a batch and share with friends for morning or afternoon tea (or coffee). Hungry friends and husbands (I know mine does) will really appreciate them!


Almond Biscotti
30 cookies

1/2 cup almonds, coarsely chopped
1 stick butter (4 oz), room temperature
2/3 cup sugar, or light brown sugar
2 eggs
2 cups Anna's GF Cake Flour Blend, or your own favorite blend
2 1/2 tbsp milk
2 tsp baking powder
1/4 tsp salt


Preheat the oven to 400 degrees.

Place all ingredients, except the chopped nuts, in a food processor. Pulse until forming dough. Remove the dough from the food processor, and place into a large bowl. Add the chopped nuts to the bowl, and mix until fully combined. Batter should be a bit sticky.


Divide the dough into 3 mounds and place on a parchment-lined cookie sheet. Form each piece into logs. Wet your hands with some water, if your fingers get too sticky.

Bake in the middle of oven for 15 minutes, until the logs are golden in color. Remove from oven. Let the logs cool for 5 minutes. Using gentle and sawing motions, cut each log crosswise into 3/4 inch-thick diagonal slices. Turn the slices on their sides. Bake for another 10 minutes.

Turn the biscotti again. Lower the oven to 250 degrees and bake for another 10 minutes.

Turn off the oven and leave the biscotti in the oven for 1-2 hours to dry.


Enjoy!


For my Swedish family and friends, here comes the recipe in Swedish:

Mandel Biscotti
ca 30 st.

Dessa knapriga italienska skorpor kan du variera hur mycket som helst. Byt ut mandeln mot hasselnötter, valnötter eller pistaschenötter. Man kan med fördel tillsätta olika kryddor som kanel, kardemumma eller korianderfrö.


1 dl (75 g) grovhackad mandel
100 gr smör, rumsvarmt
1 1/2 dl socker eller Muscovado socker
2 ägg
5 1/2 dl Anna & Ciccis Glutenfria Mjölblandning,* eller ditt eget favorit mix
2 1/2 msk mjölk
2 tsk bakpulver
1/4 tsk salt


Sätt ugnen på 200 grader.

Hacka mandlen. Använd gärna matberedare. Häll upp nötterna på en tallrik.

Tillsätt alla andra ingredienser i matberedaren. Arbeta ihop till en deg. Ta ur degen och lägg i en skål. Arbeta sedan in nötterna.

Rulla 3 längder, ungefär lika långa som plåten, på en plåt med bakplåtspapper. Blöt händerna med lite vatten om degen blir för kladdig.

Grädda i mitten av ugnen ca 15 minuter tills de fått en gyllene färg. Låt längderna vila 5 minuter. Skär längderna i 2 cm breda sneda bitar. Var försiktig, skorporna går lätt sönder innan dom har torkat. Vänd upp skorpornas ena snittyta och rosta dem i samma ugnsvärme 10 minuter.

Sänk ugnsvärmen till 125 grader. Vänd andra snittytan upp och rosta i 10 minuter.

Stäng av ugnen. Låt gärna biscotti ligga kvar på plåten i ugnen någon timme så att de torkar.


*Anna & Ciccis Glutenfria Mjölblandning:
8 dl vitt rismjöl
2 dl majsmjöl
2 1/3 dl potatismjöl
3 dl maizena (majsstärkelse)


- Posted using BlogPress from my iPad

Location:Stockholm, Sweden

Tuesday, March 20, 2012

A Swedish Tiger ~ Tiger Cake that is.


I was 19 when I left Sweden for the US. I was to stay for a year, working as an au pair in both Boston and LA. My goal was to learn English and also to do some traveling. I couldn't wait to leave Sweden and explore the world.

My dream had always been to go to college in America. I wanted the whole experience; take interesting classes, the football games, crazy fraternities, and the outrageous parties. However, attending school was not in the cards - it was way too expensive. But college looked like so much fun on TV and in the movies. In 1983, the 2 TV stations and 3 radio stations that existed in Sweden, where all run by the government. There was no commercials. No cable. No internet. Shows started promptly at 5pm and ended before midnight. Sounds boring? I certainly thought so. I left Sweden as soon as I could. After finishing high school and working 6 months in a restaurant to save up, I was on my way...

What I didn't know was that I would fall in love. I met Doug at a night club in Boston, and 3 years later, we got married. Within a few years, we had two beautiful children, Laura and Erik. While raising the kids, I got a college degree. And after attending university, I began teaching. So, I'm happy to say, I did fulfill my dream. Every summer, we took the kids to Sweden. Now, Erik is in college and Laura lives and attends university in Sweden.

It's time for me to return; to get back to my roots.

This time, I'm in Sweden for two whole months. It's really nice to be back, hanging out with family and reconnecting with old friends. I love to spend time with my sisters and extended family. We do a lot of cooking together. One of the best things in life is to enjoy a meal together with the people you love. To say the least, I'm happy to be back for more than just a vacation. I also plan to teach at Medborgarskolan in Stockholm; both Gluten-Free cooking and Creative Writing classes.

So, this first recipe from Sweden is a tribute to my mother. She was a fantastic baker. She could just throw together some simple ingredients, and voila...out came masterpieces: breads, cookies, pies, and cakes. One of my personal favorites was Tiger Cake ~ Tiger Kaka. A true old-fashioned sponge cake flavored with both vanilla and chocolate. The dark and light cake batters are swirled together, resulting in a gorgeous contrasting pattern resembling a tiger. Hence its name.


I've included the ingredient list and measurements in both the US & Metric systems. So, you can easily make this recipe from anywhere; whether you're in Sweden, US or elsewhere. This cake is also my contribution to the blog Månadens Sötsak, at www.sotsaker.com. Here, bloggers share their favorite recipes; and many are gluten-free.


Tiger Cake ~ Tigerkaka

Ingredients

2 oz butter, plus extra for pan (50 gr smör, plus extra till formen)
1/3 cup + 2 TBSP water (1 dl vatten)
2 eggs (2 ägg)
3/4 cup + 1 1/2 TBSP sugar (2 dl socker)
1 TSP vanilla extract (2 tsk vaniljsocker)
1/3 cup + 2 TBSP almond meal/flour* (1 dl mandelmjöl)
1/3 cup + 2 TBSP rice flour (1 dl rismjöl)
3 TBSP potato starch (3 msk potatismjöl)
3 TBSP fine corn flour (3 msk majsmjöl)
1 TSP ground cardamom (1 tsk kardemumma)
2 TSP baking powder (2 tsk bakpulver)
1/2 TSP lime zest (1/2 tsk lime zest)
1/4 TSP salt (1/4 tsk salt)
3 TBSP cocoa (3 msk kakao)
3 TBSP milk (3 msk mjölk)
1 1/2 TBSP cold coffee (1 1/2 msk kallt kaffe), if desired
shredded coconut for the pan (kokos till formen)

Directions

Preheat oven to 350 degrees (175 C).

Generously butter a 9-inch cake pan, or bread loaf pan. Line the pan with shredded coconut, take care to cover the bottom and sides of the pan. If you prefer, line the pan with rice or corn flour.

Melt butter. Add the water and bring to a boil. Set aside.

With an electric mixer, beat the eggs and sugar until lightly yellow and doubled in volume. Add vanilla extract and blend until combined.

In a medium-sized bowl, mix together the flours, cardamom, baking powder, lime zest, and salt.

Fold the flour mixture into the egg batter.

Add the melted butter liquid to the cake batter, and blend until smooth.

Pour 1/2 of the batter into the prepared pan.

In a small bowl, whisk together the cocoa, milk, and cold coffee. If you prefer the cake without coffee, just mix the cocoa with 6 tablespoons of milk.

Add the cocoa mixture to the remaining batter, and blend until combined. Drizzle the chocolate batter into the pan. With a knife or spoon, slowly swirl the two batters together. Take care not to over-mix. You want to end up with a nice contrast between the yellow and chocolate cake batters.


Bake for 35-40 minutes until cake tester or toothpick inserted into the middle of cake comes out clean.


Cool in pan for 15 minutes before inverting cake onto a platter. Using a large spatula, or a plate, invert the cake again. This way, the cake faces up, and displays the beautiful 'tiger' pattern. Let cool until room temperature.


Serve as is, or with a dollop of whipped cream.


Låt dig väl smaka ~ Taste and enjoy!


*It's easy to make your own almond meal/flour. And it's great to have on hand; and lot cheaper than store-bought almond flour. I use it all the time in my baking recipes, especially in pie crusts! Place 2 cups whole almonds (blanched or un-blanched) into a food processor and pulse until finely ground. Store leftover flour in the refrigerator.


- Posted using BlogPress from my iPad

Location:Stockholm, Sweden

Sunday, March 4, 2012

Simple Sunday Dessert ~ Blackberry Tart


I make this blackberry tart because it reminds me of summer! Right about now, I need a reminder that it's coming. Soon. Nothing does the trick like blackberries and raspberries. These lovely berries fill me with memories; of my mother picking raspberries in our yard and making pies, of picnics on the beach, and black raspberry ice-cream. I make sure to buy plenty of fresh berries during the summer months, at local farmer's markets, and freeze them. This way, I'll always have 'fresh' berries on hand. I bake them up in pies, cakes, and muffins during the long winter months.


This versatile tart bakes up lovely. It fills the house with a wonderful fruit scent - a promise of sun and warmth of summer. It's easy to make, can be made with whatever fruit you have, frozen, or fresh and in season. The grocery store usually have an excellent selection of frozen berries. I like to serve this tart plain. But try serving with a dollop of whipped cream or vanilla ice-cream.


Blackberry Tart

Ingredients

1/2 cup (1 stick) butter, softened, plus more for greasing pan
1 cup sugar
3 eggs
3 tbsp heavy cream, or milk
1 tsp vanilla extract
1/4 tsp lime zest
1/2 cup coconut flour
1/2 cup almond meal/flour
1/2 cup garbanzo flour
3 tbsp tapioca starch
1 1/2 tsp baking powder
1/2 tsp cinnamon
1/4 tsp salt

shredded coconut, for pan

2 cups blackberries, fresh or frozen
1 tbsp fresh lime juice
2 tbsp sugar
1 tsp cinnamon

Directions

Preheat oven to 375 degrees.

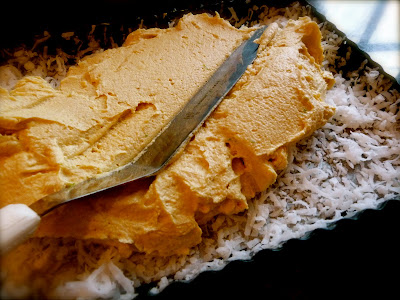
Butter a 9-inch springorm pan, or a 11 x 9-inch tart pan. Line the pan with shredded coconut, make sure it covers the bottom and sides of the pan.

In an electric mixer, cream butter and sugar on medium-high speed until light and fluffy, about 3-5 minutes. Beat in eggs one at a time, then heavy cream, vanilla extract, and lime zest.

In a medium-sized bowl, whisk together flours, tapioca, baking powder, cinnamon, and salt.

Beat in flour mixture on low speed until batter comes together. Spread in pan.


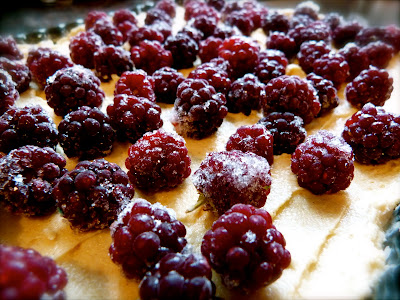
Arrange the berries on top of the batter. Sprinkle with lime juice. Mix 2 tbsp sugar with 1 tsp cinnamon, and sprinkle over the blackberries.


Bake for 35-40 minutes, until edges are golden and the center is set. Test for doneness by inserting a cake tester or toothpick into center of tart. It should come out clean.

Cool tart in pan for 10 minutes. Run a knife around edges of pan. Remove sides from pan. Serve. Take a bite, close your eyes, and think of long summer days.


Next blog will be from Sweden. I'll be there for 2 months teaching gluten-free cooking, and enjoying time with family.

Smaklig måltid ~ Bon appetit!


Tuesday, February 14, 2012

Celebrating Valentines Day with Neapolitan Cakes with Swiss Meringue Buttercream


This dessert has it all, good looks and a sweet attitude. Nothing can compare with its three layers of buttercream, unfolding in your mouth in soft waves. Each cloud-like layer is infused with its own heavenly delights, rich chocolate, delicate vanilla, and sweet raspberry. It's a beauty, all right.

The original recipe is from Sweetapolita. A place full of gorgeous photographs and inspiring recipes. I happened up on this site by default. A fellow blogger was in the thrals of baking a rainbow-colored cake for her daughter's birthday. She, in turn, had found her cake recipe on the aforementioned blog. It was fate (I think). True happiness is to find a cookbook or blog that shares your philosophy. I can always tell by the photographs, and these are good enough to eat.

My version is, of course, gluten-free, and, of course, heavenly. The cake recipe is my own, and I used Sweetapolita's Swiss Meringue Buttercream. When I served it to my husband, five seconds later, it was gone... It was well received. Try it yourself!


Neapolitan Cakes with Swiss Meringue Buttercream


Makes 6 mini cakes


Ingredients


3 eggs

3/4 cup sugar

6 tbsp potato starch

4 tbsp cocoa powder

1 tsp baking powder

1/3 tsp kosher salt

1/4 cup shredded sweetened coconut


Sweetapolita’s Swiss Meringue Buttercream

5 large fresh egg whites

1 1/4 cup granulated sugar

3/4 pound (3 sticks) unsalted butter, softened, cut into cubes

2 teaspoons pure vanilla extract

Pinch of salt


Baking Instructions


Preheat oven to 475 degrees.

Line a jelly roll pan (rectangular pan about 16”x 11” x 11”) with parchment paper.

In a stand mixer with paddle attachment, beat the eggs and sugar until thick and pale yellow ribbons form.

In a medium sized-bowl, mix the potato starch, cocoa, baking powder, salt, and coconut.

Gently fold the dry ingredients into the egg mixture.

Spread batter into the prepared pan and bake for 5 minutes.

Remove from oven.

Meanwhile, cut a piece of parchment the same size as the jelly pan, and place on the kitchen counter. Sprinkle sugar all over the parchment paper.

Let the cake cool in the pan for 6 minutes.

Invert cake onto prepared parchment paper.

Slowly, starting at one corner, remove the parchment from the bottom of cake. If the paper sticks to the cake - using a pastry brush, brush the paper with a little cold water, then remove the paper.

Place a clean kitchen towel on top of the cake. Let cool completely.


Prepare Sweetapolita’s Swiss meringue buttercream: This buttercream is just amazing. I found it on a www.sweetapolita.com - a blog featuring gorgeous cakes, with tons of tips. Even for a gluten-free baker!

Add egg whites and sugar to the bowl of an electric mixer, and simmer over a pot of water (not boiling), whisking constantly but gently, until temperature reaches 160°F, or if you don’t have a candy thermometer, until the sugar has completely dissolved and the egg whites are hot.

With whisk attachment of mixer, begin to whip until the meringue is thick, glossy, and the bottom of the bowl feels neutral to the touch (this can take up to 10 minutes or so).

Switch over to paddle attachment and, with mixer on low speed, add softened butter in chunks until incorporated, and mix until it has reached a silky smooth texture (if curdles, keep mixing and it will come back to smooth).

Add vanilla and salt, continuing to beat on low speed until well combined. You can also add a wide variety of flavorings, extracts, and more, but always add the vanilla first, as it brings out the true taste of the other flavors.

Makes approximately 5 cups of buttercream.

Divide buttercream evenly into 3 bowls. Flavor 1/3 with chocolate, 1/3 with 4 tbsp raspberry jam, and leave final 1/3 vanilla.

For Chocolate Buttercream: melt 4 oz of semi-sweet chocolate in the microwave oven for 10 seconds, stir, continuing in 10 seconds intervals until melted. Blend with buttercream until smooth. Use good quality chocolate. I like Ghirardelli Chocolate.

For Raspberry Buttercream: add 3-4 tablespoons of raspberry jam to taste. Blend until combined.

You’ll end up with leftover buttercream. Not a problem. Keep buttercream in airtight container in refrigerator for up to one week, leaving out at room temperature when needed, re-whipping in mixer for 5 minutes. Or freeze for up to 6-8 weeks. To thaw, place on counter overnight, and rewhip for 5 minutes with paddle attachment in an electric mixer.


Assembly of the Neapolitan Cakes

Using a 3-inch round cookie cutter, cut out 18 rounds of the cake. The recipe makes 6 mini cakes - 3 rounds for each cake. Lay out 6 cake-circles in front of you on the kitchen counter or on a platter.


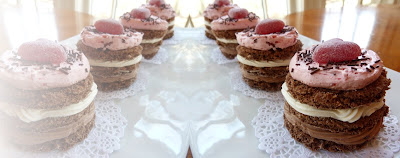
Spread the bottom layers with the chocolate buttercream. Add the second cake layers. Spread with vanilla buttercream. Add the top cake layers, and spread with raspberry buttercream. Top with GF chocolate sprinkles, if desired.

Cover the cakes loosely with plastic wrap or a cake dome. The cakes keep in the refrigerator for up to 2 days. Remove from refrigerator 3 hours before serving, to let the buttercream soften. If eaten the same day, keep the cakes covered at room temperature.


Share something sweet with someone...