I've experimented a lot with gluten-free flours and different blends; both my own and store bought. Although, there are some pretty good blends out on the market now, compared to just 5 years ago, I still prefer to make my own. It's more fun to have on hand, a lot less expensive, and works better over all. I make up a big batch and keep it in a large plastic container. This way, it's always on hand whenever I'm in the mood to bake (which is often). For most part, I buy Bob's Red Mill or Authentic Foods flours, either online or at some local outlets.
Most gluten-free recipes depend on following the list of ingredient and directions, but I’ve found that it's worth experimenting. Below, you'll find some cooking & baking tips; including great substitutions for multiple allergies. However, if these tips contradict your recipes, I recommend following the recipe instructions the first time you make it. Then, second or third time around, give them a try. You can find these and even more tips on - www.tipnut.com. I can't vouch for each and every one of them, since I haven't yet had time to try them all. But this website is a great resource. Have fun being creative in the kitchen!
Anna's GF Protein Flour Blend:
This nutritious blend adds nutrients and fiber in baked goods,
such as cookies, bread and pizza crusts.
2 cups brown rice flour
2 cups potato starch
1 3/4 cups cornstarch
1 cup garfava-garbanzo bean flour
1 cup tapioca starch
~~~~~~~~~~~~~~~~~~~~~~~~~~~~~~~~~~~~~~~~~~~~~~~~~~~
Anna's GF Cake Flour Blend:
This all-purpose blend works for all gluten-free baking.
2 cups brown rice flour
2 cups white rice flour
1 cup potato/or corn starch
1 1/2 cups tapioca starch
~~~~~~~~~~~~~~~~~~~~~~~~~~~~~~~~~~~~~~~~~~~~~~~~~~~~~
Anna's GF Fiber Flour Blend:
This blend add fiber and works for hearty baked goods; breads, granola bars, and pancakes.
2 cups brown rice flour
2 cups tapioca/ potato, or corn starch (or a blend these)
1 cup millet flour/ or quinoa flour
1 cup teff flour/ or buckwheat floour
~~~~~~~~~~~~~~~~~~~~~~~~~~~~~~~~~~~~~~~~~~~~~~~~~~~~

Baking alternatives and substitutions:
Arrowroot Flour - can be exchanged with equal measure with corn, potato or tapioca starch.
Buckwheat Flour - This flour is related to the rhubarb plant. It has a strong taste, so should be used as a blend with other gluten-free flours.
Butter - can be exchanged with equal measure with dairy-free, soy-free shortening or margarine. For example; Spectrum Organic, Earth Balance, Fleischmann's unsalted margerine. Or use vegetable - canola or olive oil.
Buttermilk - To make 1 cup of buttermilk, add 1 tablespoon lemon juice or cider vinegar to 1 cup nondairy milk; soy milk, rice milk, coconut milk, and let stand for about 10 minutes to sour.
Corn Starch - use with equal measure with potato and tapioca starch.
Eggs - You can replace 1 large egg with the following: use Ener-G egg replacer - 1 1/2 teaspoons egg replacer mixed with 2 tablespoons rice milk or water. Flaxseed meal - 1 tablespoon flaxseed meal mixed with 3 tablespoons warm water, let sit 10 minues. Chia seeds - 1 tablespoons mixed with 3 tablespoons warm water, let sit 10 minutes. Applesauce - use 4 tablespoons unsweetened applesauce mixed with 1 teaspoon baking powder. To replace 1 egg white, dissolve 1 tablespoon agar powder into 1 tablespoon water, beat, chill for 15 minutes and beat again. Do Not replace more than 2 eggs, because it will change the recipe. If recipe calls for more that 2 eggs, use pureed silken tofu.
Garbanzo Bean Flour - Often called chickpea, this flour is ground from garbanzo beans, and may be used in combination with other gluten-free flours. It is high in protein.
Garfava Flour - This flour is a combination of garbanzo and fava beans. It is high in protein.
Gelatin - Use unflavored gelatin when baking breads. Gelatin adds protein, and together with the yeast, it gives elasticity to the bread. This is especially useful when trying to cut down on eggs, milk, or other proteins.
Guar Gum - provides the binding needed to give the baked goods elasticity. Add 1 teaspoon per cup of flour blend. Can be interchanged with Xantham Gum.
Milk - use in equal measure with soy milk, almond milk, coconut milk, rice milk, goat's milk, hemp milk, fruit juice or water.
Millet Flour - This flour is a grain from the same grass family as corn, rice, and sorghum.
Nuts - you can replace nuts or peanuts with: sunflower seeds, toasted coconut and sesame seeds, pumpkin seeds, crushed cornflakes.
Sugar - use brown sugar, or for a sugar free substitute; Xylitol, a natural sugar-alcohol sweeter. If you use Stevia, replace 1 cup sugar with 1 teaspoon of powdered Stevia, 1 tablespoon of sugar with 1/4 teaspoon Stevia (from www.stevia.net . Please remember that Stevia is labeled as a dietary supplement by the FDA, not a 'sweetener.')

Sorghum Flour - This flour is made from ground sorghum grain.
Soy Flour - use with equal measure with sorghum flour, garfava flour, or quinoa flour.
Teff Flour - This flour is a grain from the same grass family as corn, millet, and rice.
Yogurt - use with equal measure with soy yogurt, coconut yogurt, unsweetened applesauce or fruit puree.
Quinoa Flour - This flour is high in protein, and is actually a relative of leafy green vegetables like spinach and Swiss chard. It is a recently rediscovered ancient "grain" once considered "the gold of the Incas." Quinoa is a great source of manganese as well as of magnesium, folate, and phosphorus. It is usually blended with other gluten-free flours, and is great in cookies, breads, biscuits, crackers and cakes.
Xantham Gum - provides the binding needed to give the baked goods elasticity. Add 1 teaspoon per cup of flour blend. Can be interchanged with Guar Gum, or replace with 1-2 teaspoons powdered gelatin per cup of gluten-free flour blend, or try 1-2 tablespoons potato flour (not starch) or coconut flour.
*Some information is gathered from www.glutenfreeliving.com, The Gluten-Free Gourmet Bakes Bread, by Bette Hagman, Gluten-Free Baking by Rebecca Reilly, www.whfoods.com.

Here are a few tips for gluten-free baking with yeast:
1. When you use gluten-free flours to make bread, there is no gluten to trap the gas that provides texture, but you can create batter with air pockets that serves the same purpose. GF flour blends are drier and therefore more absorbent, so I might have to use more liquid.
2. Use a paddle attachment on your mixer, not the bread hook, and use a low-medium mixing speed.
3. And, this is important, increase the amount of yeast by 25%. The yeast has to work harder, so use more of it. Make sure to "proof the yeast" with some of the liquid called for in the recipe. Heat the liquid (about 110-115 degrees F), add the yeast and 1 tsp sugar and let sit for 10 minutes; this allows the yeast to activate and come alive. Proof in a warm room, away from draft. Then add the yeast liquid according to recipe.
4. Let the batter rise in a warm and humid environment. For example, use the microwave oven, if it's large enough. Measure a heatproof measuring cup with 1 cup of water and heat in the microwave until boiling. Carefully push the cup to the back corner of the microwave oven, place the bread pan in the center and close the door. Keep an eye on the pan to make sure the dough is rising properly. This usually takes about 45-60 minutes, but it could happen earlier or take longer. Take it out when you see a gentle arch at the top of the pan. If the batter has spilled over the edges of the pan, it is overproofed.
5. Since GF batter cannot stand on its own, use pans or paper cups to provide side walls. Be sure not to overfill the pan, filling it no more than two-thirds full. You'll also have more success if you use smaller loaf pans, rather than large ones.
6. Increase baking time. GF breads are more dense, so may take longer to bake them.
Baking bread just takes practice. Don't give up. Think about where you've succeeded and failed, and apply that knowledge the next time.

Pure Gluten-Free Oats:
GF oats is a good thickener and binder, and can be used in baking breads and cookies. You can replace up to 25% of the Gf flour blend with oats, but make sure to increase the leavening agent a bit.
Please be advised that a small percentage of people with celiac disease may not tolerate even the purest of oats. If you are unsure whether oats are suitable for your diet, please check first with your health advisor before eating them. Introducing oats into your diet should only be done under the guidance of your physician.
There remains a long-standing controversy over whether to include oats and oat products in a gluten free diet. The standard recommendation has in the past been against it; however more recent studies show that a moderate portion of pure, non-contaminated oats are most likely safe for the majority of people with celiac decease. However, health professionals recommend that newly diagnosed celiac patients should avoid oats until the disease is well-controlled.
For more information check www.celiac.coms

More Great Baking Tips:
Cake & Cupcake Enhancers:
1Add 1 to 2 tablespoons of meringue powder to your cake recipe to help it rise a bit higher and make it a bit lighter in texture.
2Add 1 tsp of unflavored gelatin to the cake batter, helps prevent the top of the cake splitting or cracking.
3Add 1 tsp of lemon juice to the butter and sugar called for in the recipe before mixing the rest of the ingredients. Helps make the cake lighter.
4Take your time creaming the butter, beat for at least 5 minutes to get lots of air into the butter. Add the sugar and beat well again.
5Separate eggs before adding them to recipes–beat yolks till golden and creamy then add to the butter/sugar mixture. Beat the egg whites until light and frothy before folding them into the butter mixture.
Moister Cake & Cupcake Tips:
1Chocolate Cake: Before adding the baking soda to your cake recipe, mix it with a teaspoon of vinegar.
2Fruit Cakes/Dense Cakes: Keep a pan full of water in the oven when baking the cake (replace water if needed to keep it topped up).
3Substitute oil in the recipe for unsweetened applesauce or plain yogurt. Your measure can be 1:1 or 50/50. For example, if the recipe calls for 1 cup oil, use 1/2 cup oil and 1/2 cup applesauce. Different types of cakes will offer different results for texture and taste, but a good start would try the 50/50. Not only helps for moister cakes, also cuts fat.
Sifting:
1Measure all ingredients to exact amounts first, then sift.
Grease & Flour Pans:
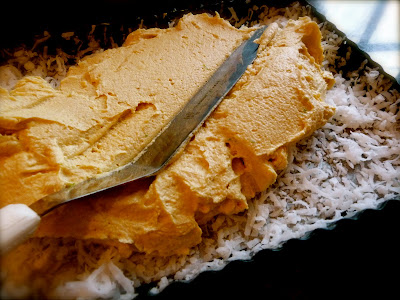
1. Try dusting the cake pans with shredded coconut or cocoa instead of GF flour.
2Grease pans with shortening then line the pan with a piece of wax paper to fit the bottom. Re-grease the top of the wax paper. Pour in the batter. To get the wax paper to size, trace the bottom of the pan and cut it out.
Baking A Level Cake:
1Fill cake pans no more than 2/3 to 3/4 full to allow for even baking and rising.
2If the cake rose high and uneven in the middle when baking, you may need to slice a bit off across the top so it’s level.
Oven Baking Tips:
1Preheat the oven for 20 minutes before starting to bake, make sure the rack is in the center of the oven (unless directed differently in the recipe). Keep pan in the center of the rack. If you’re baking more than one pan at a time, keep them at least 2″ away from the walls of the oven and from each other.
Check For Doneness:
1Using a toothpick, wood skewer; test the cake for doneness by placing the toothpick into the middle of the cake. If it comes out clean, the cake is done.
Problems With Cake Sticking To Pan:
1Place a thick, clean towel in the kitchen sink and pour a kettle of boiling hot water over the towel to heat it (don’t plug the sink to retain the water, allow it to drain out). Set the cake (still inside the pan) on the hot towel and leave it for a minute or two, the cake should turn out easily.
2Cool the cakes in the pans for at least 15 minutes before trying to remove them. Don’t cool on top of the stove where there’s heat, they’re best cooled on a rack on top of the counter. Gently insert a knife between the outside of the cake and the inside of the pan. Run it along the pan to loosen things up before turning over.
Frosting & Icing Tips:
1Don’t attempt to ice the cake until it’s completely cool. Dust the cake lightly with a pastry brush before frosting, helps reduce crumbs in the icing.
2First ice the cake with a thin layer of frosting, then refrigerate (covered). After an hour you can do a complete frosting job. This helps keep the crumbs at bay and your outer frosting layer should be crumb free.
3To help prevent a flaking or cracking frosting, add a pinch of baking soda when mixing the frosting.
4Tip for Icing Cakes: For one layer cakes, turn the cake upside down before icing so that the top is perfectly flat and even. When icing two cake rounds or squares, place a layer of frosting on the top of one round, then place the other round upside down on top for a perfectly flat top.
5Color Shredded Coconut: Shredded coconut can be a nice, decorative touch achieved easily. Simply put the coconut in a clean jar (only one half jar full at a time), add a few drops of food coloring in your choice of color, then cap the jar and shake it until all the coconut is evenly tinted.
Cutting Cake Tips:
1Heat a knife first before cutting a cake for crumble-free slices. To heat the knife, you can run the knife under very hot water then wipe dry with a clean towel.
2Use unwaxed dental floss to slice through the cake (great for the gooey or sticky cakes).

Even more tips...
1Dust the cake holder or platter with a bit of confectioner’s sugar before placing the freshly baked cake on it, this will help keep the cake from sticking to the bottom.
2Use ingredients that are at room temperature, the butter soft but not melted or oily.
3When mixing sticky ingredients (molasses, honey, peanut butter), try lightly spraying the measuring cups with non-stick spray first. The ingredients will come out easier.
4Dust nuts and fruit with GF flour before adding to cake batter or try toasting nuts first. You can also just sprinkle the nuts across the top of the batter instead of mixing them in, this way the nuts will toast while the cake bakes.
5Make Bigger Cakes From Mixes: To make a bigger cake from a Gluten-Free mix - add 1/2 cup GF flour, 1/2 cup sugar, 1 egg, 1 tsp. baking powder.
6A common problem is that the oven temperature isn’t true to what the dial says. Buy a thermometer, preheat your oven and test.
7Half And Half Cream: In a one cup measure, place 3 Tablespoons + 1 1/2 teaspoons of melted butter. Top up the cup with whole milk. You can also use an equal measure of evaporated milk as a half and half cream substitute.
8Buttermilk: You can substitute 1 cup of buttermilk with the following quick recipe–In a one cup measuring cup, add 1 TBS of vinegar or lemon juice, then top up the rest of the measuring cup with milk. Set aside for 5 minutes, stir, then use as buttermilk in the recipe.
9Sour Cream: 1/3 cup milk + 2 teaspoons lemon juice + 1 cup cottage cheese. Process in a blender until smooth.
10Graham Cracker Crumb Crust: In a pinch you can use crushed corn flakes in place of graham cracker crumbs. Recipe for crust: 2 cups crushed corn flakes*, 1/3 cup melted butter, 2 TBS sugar. Gradually add the melted butter to the crushed corn flakes and sugar. Mix well and press into pie plate (8″ or 9″). Bake at 350° for 10 minutes. *Use the non-frosted corn flakes.
11Chocolate Squares: 3/4 cup unsweetened cocoa & 1/4 cup melted Crisco (Substitution for 4 ounces unsweetened chocolate squares).
12Soy Sauce: Mix 3 tablespoons molasses, pinch ground ginger, 2 tablespoons Worcester sauce, and a little flour.
13Balsamic Vinegar:: 1 tablespoon cider vinegar plus 1/2 teaspoon sugar = 1 TBS balsamic vinegar; or 1 tablespoon red wine vinegar plus 1/2 teaspoon sugar = 1 TBS balsamic vinegar; or equal amount of sherry or cider vinegar.
14Molasses: Honey; Dark Corn Syrup; Maple Syrup
15Lemon Juice: 2 tablespoons lemon juice = 1 tablespoon vinegar.
Baking Powder:
1Try 1/4 tsp baking soda & 1/2 tsp cream of tartar to substitute for 1 tsp baking powder.
21/2 tsp baking soda per 1 cup of buttermilk (substitute for 2 tsp baking powder–use buttermilk already called for in recipe).
31/2 tsp baking soda per 1 cup of sour milk (or use 1 cup milk soured with 1 TBS vinegar or lemon juice; use milk already called for in recipe)–substitute for 2 tsp baking powder
41 cup of milk with 1 3/4 tsp cream of tartar, add 1/2 tsp baking soda–substitute for 2 tsp baking powder (use milk already required in recipe)
51/2 tsp baking soda per 1 cup of molasses (use molasses already called for in recipe)–substitute for 2 tsp baking powder
Sweetened Condensed Milk:
13/4 cup sugar, 1/3 cup butter, 1/3 cup boiling water, 1 cup skim milk powder. Combine all ingredients in a blender and mix until all lumps are gone and milk is smooth. Store in refrigerator and chill before using.
23/4 cup sugar, 1/3 cup water, 1/4 cup margarine. Bring to a boil until margarine melts and sugar is dissolved. Add 1 cup dry powdered milk and beat until smooth.
31/4 cup hot water, 3/4 cup granulated sugar. Mix in blender for 1 minute or until sugar is partially dissolved. Continue to blend slowly adding 1 1/4 cups skim milk powder. Cover and refrigerate 24 hours before using. Makes 1 1/2 cups.
41/4 cup margarine, 1 cup boiling water. Melt the margarine in the water then add 2 cups white sugar. Beat with mixer until smooth. Gradually add 4 cups skim milk powder, beat until smooth and thick. Makes 3 cups, keep refrigerated.
51/2 cup hot water (scant), 3/4 cup sugar, 1 1/2 cups powdered milk. Add water to blender, start blending while gradually adding powdered milk. Gradually add sugar. Blend until sugar is dissolved. Cool and refrigerate before using.
6Dissolve 1/4 cup margarine in 1 cup boiling water. Add 2 cups sugar, beat with mixer until dissolved. Gradually add 4 cups skim milk powder. Beat. Makes 1 quart, keep refrigerated.
Brown Sugar:
1Directions: Mix ingredients together well with a fork or with your hands then store in an airtight container or sealed plastic bag.
Recipe #1 (makes 1 cup)
1 cup Sugar (white)
1 TBS Molasses (for light brown) or
2 TBS Molasses (for dark brown)
Recipe #2 (makes 3 cups)
3 cups Sugar (white)
1/4 cup Molasses
Recipe #3 (makes 9 pounds)
9 lbs Sugar (white granulated)
1 lb Molasses
Tips:
1Try different varieties and measurements of molasses to see what you like best.
2The darker the color of the brown sugar the stronger the flavor.
Whipped Cream:
Whipped Cream Substitute
2 large ripe bananas, sliced
3 tsp sugar
2 egg whites
Directions:
1Whip all ingredients together just like you would regular cream. Add some flavoring if you like.
Flavoring Ideas: Almond Extract, Vanilla Extract, Flavored Liqueur, Lemon or Orange Zest, Instant Coffee, Sifted Cocoa, Cinnamon
Cutting Cake Tips:
1Heat a knife first before cutting a cake for crumble-free slices. To heat the knife, you can run the knife under very hot water then wipe dry with a clean towel.
2Use unwaxed dental floss to slice through the cake (great for the gooey or sticky cakes).

Happy Baking!